- TL;DR
- Why a mini split makes water in the first place
- The most common causes of a mini split leaking water
- Quick reference: symptom, likely cause, next step
- Safe checks you can do before you call
- Is it condensate or a refrigerant leak?
- When to turn it off and call a professional
- What a technician does about a mini split condensate leak
- How to prevent condensate leaks
- Our perspective on mini split leaks
- Get a leaking mini split fixed in Los Angeles
- FAQ
- Sources
- Recommended

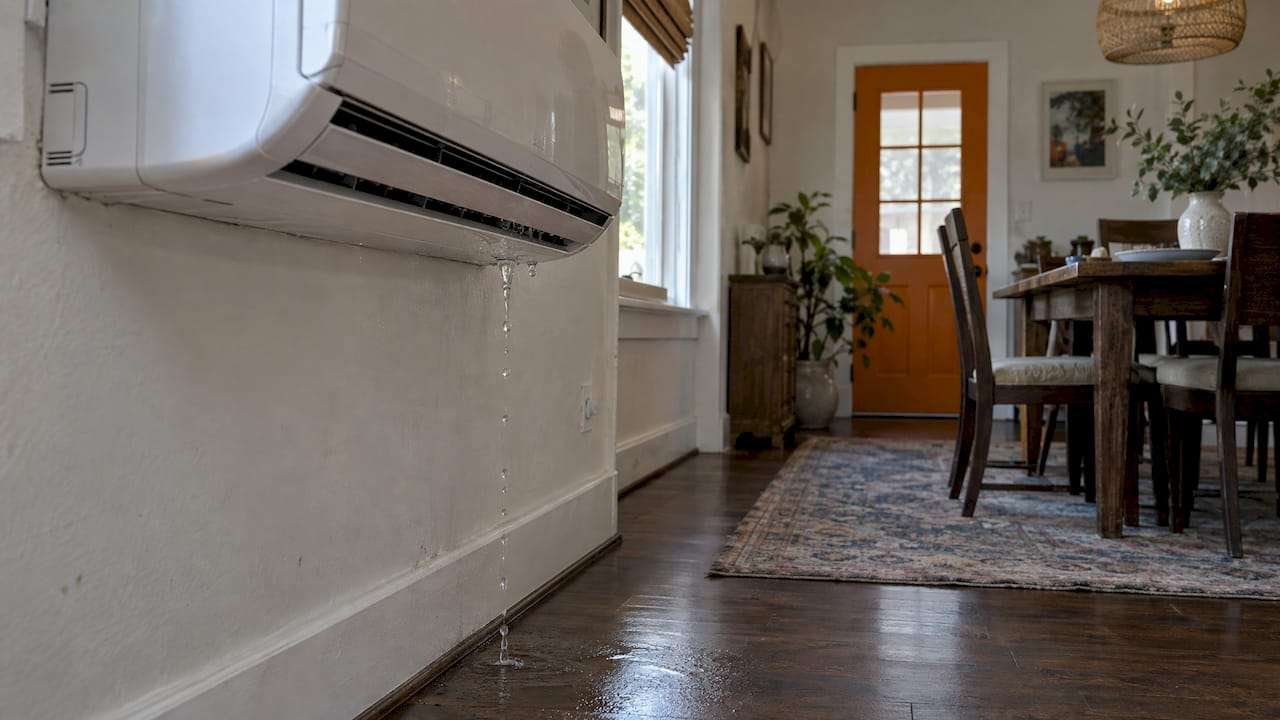
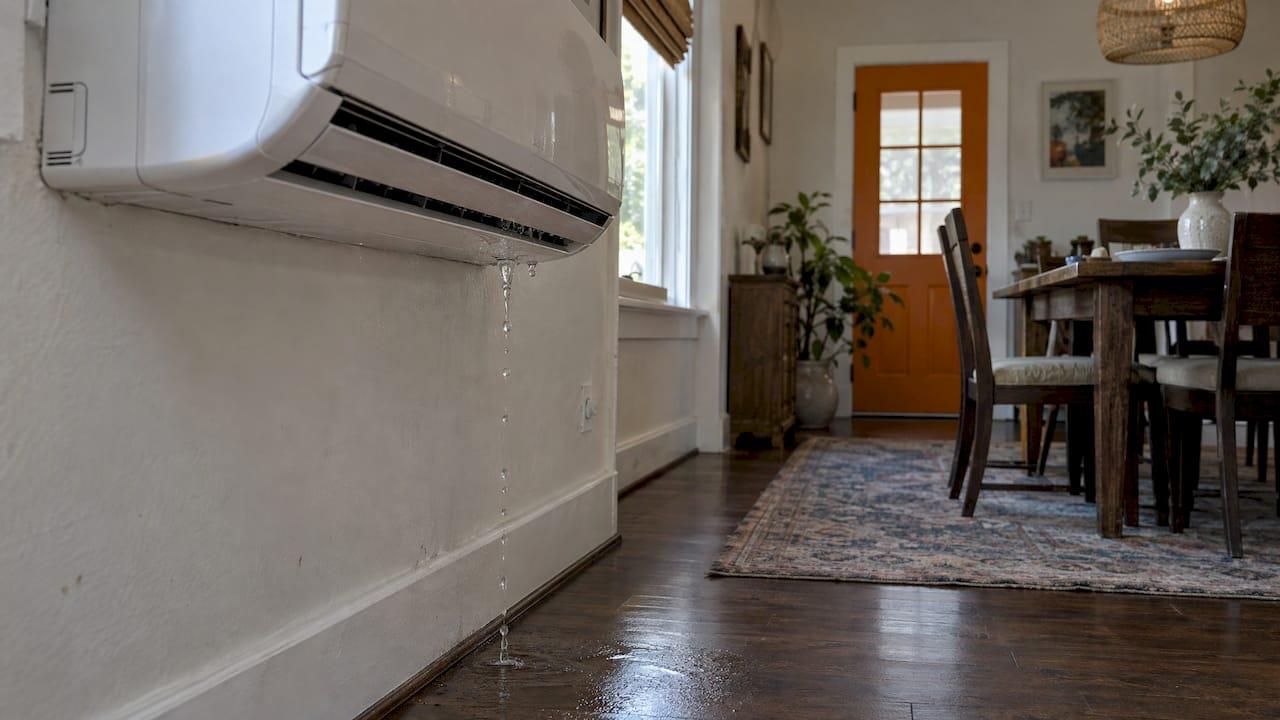
If your mini split is dripping water inside, the cause is most often a clogged condensate drain line, a dirty filter or a damaged drain pan. Carrier lists those three as the usual culprits, and improper installation or low refrigerant can add ice that melts and drips. Some of these you can check safely in ten minutes. Others need a technician. This guide shows you which is which, so you protect your walls and floors and do not guess.
TL;DR
- A mini split makes water every time it cools. That water should leave through a drain line. A leak means the water has nowhere to go or is going the wrong way.
- The most common causes are a clogged or kinked drain line, a dirty filter, a cracked or rusted drain pan, poor drain slope, and a frozen coil that thaws.
- Safe first steps: turn the unit off, clean the filter, look for ice, and check the drain line outlet outdoors.
- Water dripping in heat mode is not normal. Ice, steady dripping, or any sign of a refrigerant problem means it is time for a professional.
- We offer a service call from $125 and flat-rate pricing for repairs in Greater Los Angeles. Call (323) 970-3113.
Why a mini split makes water in the first place
Your mini split removes moisture from the air as it cools. Warm room air passes over a cold indoor coil. When the coil is colder than the dew point of that air, water vapor turns into liquid, the same way a cold glass of lemonade “sweats” on a summer afternoon. A drain pan collects that water and sends it through a hose or pipe to the outdoors or another approved discharge point.
So yes, your mini split has a condensate line. It is usually a flexible tube that runs out the back of the indoor unit, wrapped with the refrigerant lines, and exits through the wall.
This explains one useful clue. A mini split produces condensation only while cooling, so it should not leak water in heat mode. If you see water while heating, something other than normal condensation is going on, and a technician should look at it.
The most common causes of a mini split leaking water
A clogged or kinked condensate drain line
This is the number one cause. Dust, mold, algae and bugs build up in the line. Water cannot flow out, so it backs up into the pan and spills over the front or sides of the indoor unit. Pioneer’s support team says the most common reason a wall-mounted unit leaks is a drain tube that is cracked, clogged, or not sloping continuously downward.
A kink works the same way as a clog. A tube bent behind the unit or crushed where it passes through the wall will hold water back. Sagging sections that form a low spot also trap water and encourage buildup.
In Los Angeles, mini splits in guest houses, garage conversions and older homes often have long drain runs added after the fact. Long runs with low spots are the ones that clog first.

A dirty air filter
A clogged filter restricts airflow across the coil. A severely clogged filter can freeze the evaporator coil, and the frozen coil drips as it thaws. The meltwater can exceed what the pan and line can handle. Bryant recommends cleaning mini split filters every two to four weeks to help prevent leaks. If your unit runs daily during an LA heat wave, lean toward the shorter end of that range.
A cracked, rusted or overflowing drain pan
The drain pan sits under the coil inside the indoor unit. In older units it may rust or crack, which lets water escape before it reaches the drain. A pan that is full of debris or dust can also overflow even if the line itself is open. You usually cannot see the pan without opening the unit, which is one reason this one often needs a pro.

Poor installation or the wrong slope
Condensate drains by gravity, so the line has to fall continuously. Carrier’s installation guidance calls for a minimum gradient of 1/100, about 1/8 inch of drop per foot, to keep water from flowing back toward the unit. Manufacturers differ on the exact figure, so the installation manual for your model is the reference. A unit that is mounted slightly out of level can also send water out the wrong side of the pan.
GREE specifies that the drain should end 6 inches above grade, and notes that direct sewer connections generally need an air gap to meet plumbing codes. A line that ends in dirt, mulch or standing water can clog from the outside, and a leak that starts after landscaping work is often this.
A frozen coil
Ice on the coil is a symptom, not the root problem. Bryant advises that a technician should check airflow and refrigerant levels before the system goes back to normal operation. Low refrigerant, restricted airflow, or a failing component can all cause freezing. If you see frost on the indoor unit, our guide to signs your AC unit is freezing explains what is happening.
Quick reference: symptom, likely cause, next step
| What you see | Likely cause | Safe next step |
|---|---|---|
| Slow drip from the bottom of the indoor unit during cooling | Clogged drain line or dirty filter | Turn off, clean filter, check outdoor drain outlet |
| Water running down the wall behind the unit | Kinked or disconnected drain tube | Turn off and call for service |
| Ice or frost on the coil, then dripping | Airflow problem or low refrigerant | Turn off, let it thaw, call for service |
| Water leaking from both sides of the unit | Overflowing pan, blocked line, or unit out of level | Turn off and call for service |
| Dripping while in heat mode | Not normal condensation | Turn off and call for service |
| Musty smell with the leak | Mold or algae in the pan or line | See our mini split smells guide and book service |
Safe checks you can do before you call
Start with the simple things. These match the steps Carrier outlines for diagnosing a leaking mini split: filter, pan, drain line, ice.
- Turn the system off. Use the remote, then switch off the breaker if you plan to open anything. Water and electricity do not mix, and a leaking unit is a good reason to shut it down until you know why.
- Put a towel and a shallow pan under the unit. This protects the floor while you look.
- Check and clean the filter. Slide it out, vacuum off the dust, rinse with lukewarm water if it is washable, and let it dry fully before putting it back.
- Look for ice. Open the front panel and check the coil. If you see frost or ice, leave the unit off and let it thaw. Do not chip it.
- Find the drain outlet outside. Follow the tube through the wall. Is it crimped? Is it blocked by dirt, leaves, a spider web or a nest? Is the end sitting in soil or water?
- Look for standing water. If the pan is full while the system has been off for hours, the line is likely blocked.
- Try a gentle flush only if you are comfortable. Pioneer notes that a 50/50 mix of water and white vinegar can be poured into a debris-filled drain pan to help unblock it. Use only what the manufacturer’s manual allows, and stop if water does not drain.
If you want a fuller picture of what is reasonable to handle yourself, we wrote about whether to repair a mini split yourself.
What not to do
- Do not open the unit with power on.
- Do not run the system for days “to see if it stops.” Water that gets into drywall, insulation or a ceiling cavity causes more damage than the repair costs.
- Do not use harsh chemicals in the pan or line unless the manufacturer’s manual says they are safe for your unit.
- Do not tilt or re-hang the indoor unit without knowing how the drain is routed.
Is it condensate or a refrigerant leak?
This is a common point of confusion. Condensate is plain water. A refrigerant leak does not make a puddle, because refrigerant is a gas at room temperature and escapes quietly. Still, the two problems are linked, because a refrigerant shortage is one of the reasons a coil freezes and then drips.
Here is how to separate them:
- Clear, odorless water that appears while the unit is cooling points to condensate. Check the filter, line and pan.
- Ice on the indoor coil, weak cooling and long run times can point to low refrigerant. Carrier notes that low refrigerant levels can cause ice buildup that melts and drips.
- Hissing or whistling sounds, oily residue at line set connections, or a unit that never reaches the set temperature are reasons to stop and call. Refrigerant work requires certified technicians and specialized tools. It is not a home fix.
If you see ice, Carrier recommends professional service for reduced airflow, freezing, or anything you are not comfortable repairing yourself.
When to turn it off and call a professional
Cleaning a filter is a homeowner job. The rest usually is not. Call a technician if:
- The leak returns after you have cleaned the filter and checked the line.
- You see ice or frost on the coil.
- Water is running behind the wall, or you see staining on drywall or ceilings.
- You cannot reach the drain pan or line without opening the unit.
- You smell mold or notice growth in the unit.
- You have any electrical concern, such as a tripped breaker, a burning smell or damp wiring.
- The system is in heat mode and still dripping.
This lines up with Bryant’s guidance that a leaking mini split calls for a dealer visit, and with its advice to schedule professional maintenance twice a year, once before cooling season and once before heating season.
For more on timing, see our article on when to call a professional for AC issues.
What a technician does about a mini split condensate leak
A proper visit follows a logical order, so you are not paying for guesswork:
- Confirm the symptom. The tech checks whether the unit is cooling or heating, and whether water appears at the unit, the line or the outdoor termination.
- Check airflow. Filter condition, fan operation and coil cleanliness come first, because they are the cheapest causes to fix and a frequent cause of freezing.
- Inspect and clear the drain. The line is traced end to end for kinks, sags and blockages. The pan is checked for debris, cracks and rust.
- Check level and slope. The indoor unit should be level enough to drain properly, and the line should fall continuously to its outlet.
- Test the drain. Water is poured through to confirm it flows freely. Pioneer describes this kind of drainage test with the panel open and filters removed.
- Check refrigerant and coil temperature if there was ice. Treating ice without finding why it formed means the leak comes back.
- Explain the options. You should hear what failed, what it costs, and what is optional, before any work begins.
Gravity drain or condensate pump?
Most indoor units drain by gravity. Rectorseal notes that the majority of mini split evaporator installations do not need a condensate pump, because the pan drains by gravity. A pump is for cases where the line cannot fall continuously to a safe discharge point. When a pump is used, the same attention to the line applies: a pump can fail, and a failed pump can mean an overflow. If your leak began after a pump was added, mention that to the technician.
How to prevent condensate leaks
Most leaks are preventable with small habits:
- Clean the filters on a schedule. Every two to four weeks in heavy use, per Bryant’s maintenance advice.
- Check the drain line monthly. Bryant also recommends monthly line checks for clogs. A quick look outdoors during cooling season takes a minute.
- Keep the outdoor drain end clear. Trim plants, move mulch, and keep it off the ground by the height the installer used.
- Do not let the unit sit dirty. A film of dust and biological growth on the coil and pan is what eventually plugs the line.
- Book maintenance twice a year. Once before cooling season, once before heating. For a heat pump mini split that runs year-round in Los Angeles, that rhythm fits well.
- Pay attention to early signs. A faint gurgle, a damp spot on the wall, or a musty smell can come well before a visible drip.
For related causes in ducted systems, see preventing water leaks in AC units, what to do about a clogged AC drain line, and our piece on sweating ducts.
Our perspective on mini split leaks
Most mini split leak calls we get are not mysterious. Something is dirty, kinked, or sloped the wrong way, and a small problem is turning into a wet wall. Our job is to find the real cause, tell you what it is, and fix only what needs fixing.
We specialize in heat pumps, mini splits, and commercial VRF systems, so we see these leaks from the installation side and the repair side. That matters, because many drip problems start with how the drain line was run in the first place. When we trace a leak back to a sag or a poorly routed line, we tell you plainly and show you where.
You should not be surprised by a diagnostic fee, and you should not be pushed to replace a system that just needs a clear drain. We price repairs at a flat rate so you know the cost before work begins. A leak is a good reason to call early: water damage costs far more than a drain cleaning.
Leo
Get a leaking mini split fixed in Los Angeles
If your indoor unit is dripping, turn it off, protect the floor, and call us. We offer same-day service across Greater Los Angeles, including Hollywood, Beverly Hills, Bel Air, Brentwood and the Valley. A service call starts at $125, and repairs are quoted at a flat rate, so there are no surprise diagnostic fees. You can see everything we handle on our services page, or learn about mini split repair and ductless service in your area.

If the leak keeps coming back because the drain was never routed well, or the unit is near the end of its life, we also install mini splits. Mini split installation is listed at $3,500 to $20,000 depending on the number of zones and the home, and heat pump installation at $5,500 to $12,000. Financing options are available. To avoid repeat leaks, our HVAC maintenance plan is $180 to $250 per year. Call us at (323) 970-3113.
FAQ
Does a mini split have a condensation line?
Yes. Every cooling mini split has a condensate drain. Water that forms on the cold coil drops into a pan and leaves through a tube, usually out the back of the indoor unit and through the wall. If that tube clogs, kinks or loses its downward slope, water backs up and drips inside.
Why is my mini split dripping water inside?
The usual reasons are a clogged drain line, a dirty filter, a damaged drain pan, poor drain slope, or a frozen coil that is melting. Turn the unit off, clean the filter, and look for ice and for a blocked drain outlet outdoors. If it still drips, call a technician rather than running it.
Is it normal for a mini split to drip water?
Some moisture outside is normal in cooling mode, and water should leave through the drain. Dripping inside the room is not normal. A mini split should not leak water in heat mode, because condensation forms only when cooling.
Where is the drain pan on a mini split?
It sits inside the indoor unit, under the evaporator coil, and catches the water that condenses there. Reaching it normally means removing the front panel and sometimes more, with the power off. Because the pan can crack or rust, and cleaning it involves electrical parts nearby, a technician should handle anything beyond a simple look.
Can I fix a mini split condensate leak myself?
Cleaning the filter and clearing an obviously blocked outdoor drain end are reasonable homeowner tasks. Anything involving ice, refrigerant, the pan, or opening the unit is better left to a pro. Carrier says some leaks are simple fixes while others point to serious mechanical issues.
Sources
- Carrier: Mini Split Leaking Water? Diagnosis & DIY Repair Tips
- Trane: Mini-Split Leaking Water: Causes and Solutions
- Bryant: Mini Split Leaking Water? 6 Causes & How to Fix Them
- Bryant: Ductless Mini Split Maintenance Guide & Tips
- Pioneer Mini Split: Understand Why Your Wall-Mounted Indoor Unit is Leaking
- GREE Comfort: How to Run a Drain Pipe for a Mini Split
- Rectorseal: Installing Condensate Pumps
- Chill Mini Splits: Mini Split Condensate Drains Explained
Recommended
Leo, Propietario y Técnico Principal en LC Heating & Air
Leo dirige LC Heating & Air como propietario-operador y tiene la licencia C-20 HVAC #1073586 de California. Sus guías se enfocan en diagnósticos prácticos, decisiones de reparación seguras y consejos claros para propietarios de Los Ángeles.