- What causes uneven airflow in older homes
- Prepare the system: inspect, seal, and insulate ducts before balancing
- How to measure airflow and pressure in an old-house duct system
- Step-by-step balancing: safe DIY adjustments and when to hire a pro
- When balancing isn’t enough: duct repairs, resizing and heat-pump considerations
- Costs, timeline, and what to expect from a professional balancing job
- Diagnostic-first thinking pays off in old houses
- How LC Heating & Air can help with old-house airflow problems
- Sources
- FAQ
- Recommended

Start by sealing accessible duct leaks and insulating ducts in unconditioned spaces, then measure register airflow and static pressure before you touch a single damper. Balancing before sealing usually fails because you’re just redirecting air that’s already escaping through gaps. If your returns look undersized or a professional flags a combustion-safety concern, that’s your cue to call in a qualified technician rather than keep adjusting registers on your own.
TL;DR:
- Sealing and insulating ducts before balancing are essential, as leaks can cause inefficient airflow and negate the effects of register adjustments.
- Older homes often lose 20% to 30% of airflow through leaks, with some systems leaking as much as half, significantly reducing conditioning efficiency.
- Proper measurement using tools like flow hoods and manometers is necessary to identify actual issues and avoid guessing, especially in complex or inaccessible duct systems.
- Adjustments should only be made after confirming ducts are sealed and static pressure is within safe ranges, with balancing accuracy typically within ±20% of design targets.
- In cases of severe duct deterioration or high leakage, repair or replacement may be needed instead of balancing, especially before installation of high airflow appliances like heat pumps.
What causes uneven airflow in older homes
Older homes develop hot and cold spots for reasons that have little to do with your thermostat settings. The ductwork itself is often the culprit. Many existing systems leak 20% to 30% of total system airflow, and older, poorly sealed systems can leak as much as half of the air moving through them. That’s conditioned air paying to heat or cool your attic instead of your living room.
Return-air problems compound the issue. When bedroom doors close and there’s no dedicated return in that room, pressure builds up and can push air out through wall or ceiling gaps, pulling in unconditioned or even combustion air from elsewhere in the house. Older construction adds its own quirks: long duct runs that lose pressure along the way, undersized trunks sized for a different era’s equipment, and panned returns built into joist bays or wall cavities that were never actually designed to carry air.
A few patterns show up again and again in older houses:
- Rooms at the end of a long duct run tend to run warmer in summer and colder in winter than rooms near the air handler.
- Homes with only one or two central returns often develop pressure imbalances the moment interior doors close.
- Ducts running through unconditioned attics or crawlspaces lose a meaningful share of their heating or cooling capacity before the air ever reaches a register.
- Building-cavity “ducts,” a common shortcut in older construction, leak more and insulate worse than sheet metal or flex duct.
Each of these has a specific fix, which is why a proper diagnosis matters more than guessing.
Prepare the system: inspect, seal, and insulate ducts before balancing
Sealing comes first because it changes the baseline everything else is measured against. Duct sealing can cut HVAC energy use by roughly 18% to 20%, with a payback period of about three to four years, and sealing should happen before any register adjustments so the air you’re balancing actually makes it to the room. For more detail on the methods involved, LC Heating & Air’s guide on effective methods to seal leaky air ducts walks through the process step by step.
A basic inspection and sealing sequence looks like this:
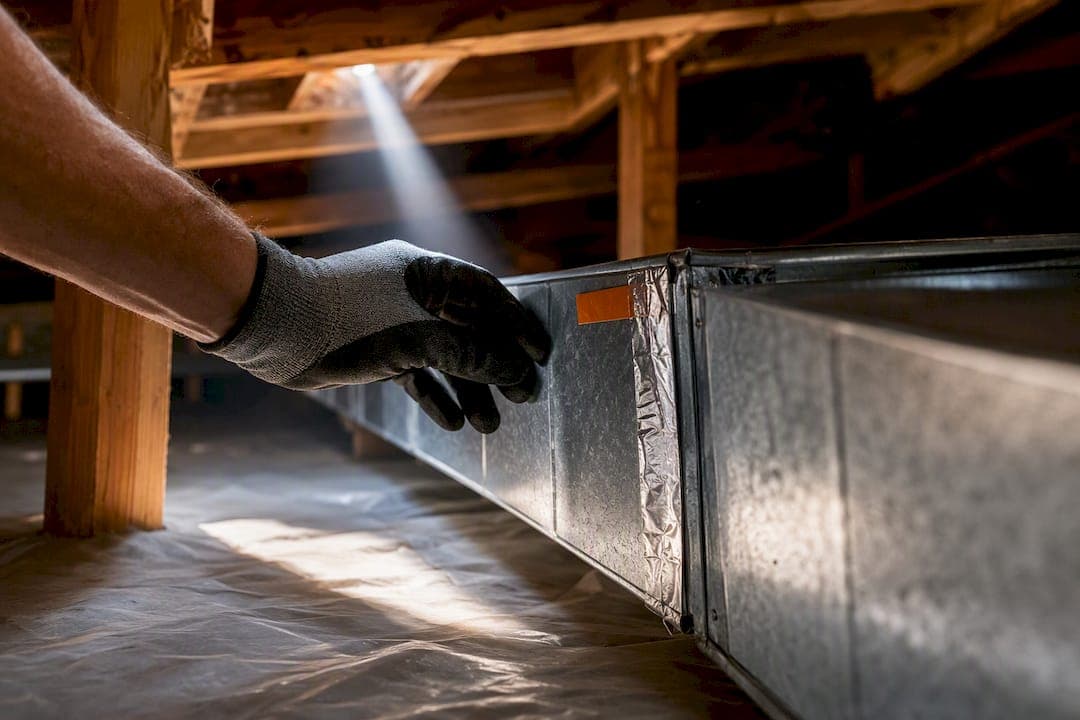
- Walk the accessible duct runs in the attic, basement, or crawlspace and look for visible gaps, disconnected joints, and crushed or kinked flex duct.
- Seal accessible metal joints and seams with mastic sealant or foil tape rather than standard cloth-backed duct tape, which dries out and fails within a few years.
- Wrap or replace insulation on ducts running through unconditioned spaces, since bare metal ducts in a hot attic lose a lot of their cooling capacity before air reaches the register.
- Note any runs you can’t reach or that look severely disconnected. Those need a professional, not a DIY fix.
Some ducts simply aren’t reachable through an attic hatch or crawlspace opening, especially in older homes where ducts run inside plaster walls or floor cavities. In those cases, aerosol sealing methods like Aeroseal can seal leaks from the inside of the system without opening walls, though the technique is targeted and won’t fix a duct that’s fully disconnected or crushed.
Pro Tip: If you can see daylight through a duct joint or feel air blowing on your hand near a connection, that’s an easy win: seal it before you do anything else.
Sealing ducts changes airflow pressure throughout the house, and that includes the pressure that helps a furnace, water heater, or fireplace draft properly. Duct sealing reduces the risk of pollutants and backdrafting when done correctly, but any major sealing project should be followed by a combustion-safety test on gas appliances to confirm they’re still venting the way they should. This isn’t a step to skip, particularly in an older home with an aging furnace or water heater.
How to measure airflow and pressure in an old-house duct system
You can’t balance what you haven’t measured, and guessing at airflow is how homeowners end up throttling the wrong register. Professionals rely on a handful of tools to get real numbers instead of impressions.
- A flow hood (also called a balancing hood) fits over a supply register and reads cubic feet per minute (CFM) directly.
- A vane anemometer measures air velocity at a register or duct opening, which then gets converted to CFM based on the opening’s area.
- A manometer reads static pressure inside the duct system, telling you whether the blower is fighting too much resistance.
- A duct blaster pressurizes the duct system to quantify total leakage, which is how contractors put a number on how leaky your ducts actually are.
If you don’t have access to these tools, you can still get a rough sense of a problem by feeling for weak airflow at registers or noticing rooms that never seem to reach the thermostat’s setpoint. But professionals take multiple readings at each register and average them, because a single measurement can be thrown off by a nearby fan, an open window, or even how the flow hood sits on the register.
One useful number to know: a room’s balancing ratio compares measured CFM at its registers to that room’s design load. According to retrofit decision guidance, the process involves measuring each register’s CFM, summing the flows for a room, and comparing that total to what the room’s design load calls for. A room reading well below its target usually points to a duct capacity or return-air problem, not something you can fix by cranking open a damper.

Step-by-step balancing: safe DIY adjustments and when to hire a pro
Balancing is the last step, not the first, and it only works once sealing is done and pressures are within a normal range. Rushing this sequence is the single most common mistake homeowners make.
- Confirm ducts are sealed, static pressure readings look reasonable, and any combustion-safety check has passed before adjusting anything.
- Set the air handler fan to its highest normal speed and measure CFM at every register in the house, not just the ones that feel obviously weak.
- If trunk dampers are accessible, adjust those first since they control airflow to entire branches rather than single rooms.
- Fine-tune individual register dampers in small increments, one room at a time, then re-measure before making another adjustment.
- Stop adjusting once each room’s measured CFM falls close to its design target, and document the final readings for future reference.
Pro Tip: Adjust one damper, wait a few minutes, then re-measure. Airflow shifts throughout the whole system when you close off one branch, so a change in the living room can quietly starve the bedroom down the hall.
Throttling registers in a leaky system can backfire. Closing dampers raises static pressure in the ducts, and restricting registers too aggressively in a leaky system can push more air out through existing leaks, which lowers efficiency and can stress the blower motor over time. That’s the trap a lot of homeowners fall into: they close a register to force air elsewhere, and instead they’ve just increased how much conditioned air leaks into the attic.
Some signals mean it’s time to call a professional instead of continuing to tinker: trunk dampers you can’t reach or adjust, a return-air shortage severe enough that closed doors cause noticeable pressure changes, a need for full Manual D or Manual J calculations, or static pressure readings that look dangerously high. None of these are DIY territory.
When balancing isn’t enough: duct repairs, resizing and heat-pump considerations
Sometimes the problem isn’t balance at all. It’s capacity. A few signs point to repair or replacement rather than adjustment:
- Duct blaster tests showing leakage well above the typical range even after sealing accessible joints.
- Rooms that stay far below their design CFM no matter how trunk and register dampers are adjusted.
- Ductwork material that’s visibly deteriorated, crushed, disconnected, or original to a house built decades before current standards.
- A planned heat pump installation, since some heat pumps require higher airflow than the older duct system was designed to deliver.
That last point matters more than homeowners expect. Before swapping a furnace or aging AC for a heat pump, it’s worth verifying that the existing ductwork can actually handle the airflow the new equipment needs. Duct capacity should be checked before any equipment swap, because undersized ducts paired with a heat pump can mean poor performance no matter how well the unit itself is rated.
Depending on what the diagnosis turns up, the fix might be as simple as adding a transfer grille or jump duct to relieve pressure in a closed-off room, as involved as replacing one deteriorated branch, or as significant as a full duct replacement. LC Heating & Air’s guide on replacing aging ductwork covers what that decision looks like in practice. When the scope grows beyond patch repairs, a proper Manual J load calculation paired with Manual D duct sizing gives you a system built for the house you actually have, not the one it was designed for decades ago. LC Heating & Air’s explanation of HVAC load calculations breaks down why that step matters before major changes.
Costs, timeline, and what to expect from a professional balancing job
Costs vary based on how accessible your ducts are, how much leakage a duct blaster test turns up, and whether the job calls for aerosol sealing or a full Manual D redesign. A quick diagnostic visit with a flow hood and manometer typically takes one to two hours. Sealing and balancing a moderately leaky system often takes half a day to a full day, while duct replacement on an older home can stretch across multiple days depending on how much ductwork needs to come out.
A professional balancing job follows a documented standard: ACCA’s commissioning guidance calls for room airflows within ±20% or 25 CFM of design targets, which gives you a concrete benchmark instead of a vague promise that “it should feel better.”
What a thorough job includes:
- A before-and-after CFM report for every register in the house.
- Static pressure readings taken at the air handler.
- A combustion-safety certificate when the job involved sealing near a gas furnace or water heater.
Diagnostic-first thinking pays off in old houses
Most airflow complaints in older homes get blamed on the wrong thing. Homeowners assume the furnace is undersized or the AC needs replacing, when the real issue is a leaky return or a duct that’s been crushed under someone’s old renovation. Measuring first, before recommending any repair, is the only way to know which problem you’re actually solving.
At LC Heating & Air, that means arriving with a flow hood and a manometer, not just a clipboard and a guess. Flat-rate pricing keeps the diagnostic honest: there’s no incentive to find a bigger problem than what’s actually there, and no surprise fee tacked onto the invoice after the fact. If a contractor tells you your system needs balancing, ask what they measured and what the numbers looked like before and after. A sealing checklist, register CFM readings, and a combustion-safety verification aren’t extras. They’re the baseline for any repair that’s supposed to actually fix the problem instead of just moving air around.
— Leo
How LC Heating & Air can help with old-house airflow problems
If you’d rather have a professional handle the sealing, sealing checks, and balancing work, LC Heating & Air offers diagnostic visits built around actual measurements rather than guesswork. Flat-rate pricing means you know the cost before work starts, with no surprise fees tacked on after the technician opens up your ductwork.

Services relevant to older homes include:
- Duct sealing and diagnostic airflow assessments.
- Duct repair and replacement for deteriorated or undersized runs.
- Compatibility checks before an equipment swap.
When you book a visit, ask for a register CFM report, static pressure readings, and a combustion-safety check as part of the job. You can schedule a diagnostic service call directly through LC Heating & Air to get started.
Sources
Facts on duct leakage and sealing savings come from ENERGY STAR and DOE Building America retrofit guidance. Balancing procedure and sizing standards reference ACCA Manual D and Manual J.
FAQ
Is air balancing worth it in an older house?
Balancing is worth it once ducts are sealed and insulated, since it corrects the room-to-room differences that sealing alone doesn’t fix. Skipping the sealing step first often means balancing adjustments won’t hold, because leaks keep changing how much air actually reaches each register.
What is the $5,000 HVAC rule?
The commonly cited rule suggests multiplying a system’s age by its repair cost, and if that number exceeds a certain threshold, replacement may make more financial sense than another repair. It’s a rough guideline homeowners use to weigh repair against replacement, not a formal industry standard.
How much does it cost to balance an AC system?
Cost depends on how accessible your ductwork is and how much sealing the system needs before balancing can even start. A basic diagnostic visit with airflow measurements typically runs one to two hours, while sealing and balancing together can take half a day to a full day depending on the extent of the leaks found.
How long should I circulate air in my house?
Running the fan on high for at least a few minutes at each measurement point gives readings time to stabilize before you record them. For general comfort, many older homes benefit from longer fan run times during extreme weather, since it helps even out temperature differences between rooms served by long or leaky duct runs.
Recommended
Leo, Owner & Lead Technician at LC Heating & Air
Leo leads LC Heating & Air as an owner-operator and holds California CSLB C-20 HVAC license #1073586. His guides focus on practical diagnostics, safe repair decisions, and clear advice for Los Angeles homeowners.