Thermostats control your heating and cooling systems by sending electrical signals to the HVAC system based on the temperature you set. Wiring a thermostat involves connecting the correct wires to the appropriate terminals. Let’s start by familiarizing ourselves with the basic components and tools you’ll need.

The Role of a Thermostat
A thermostat acts as the control center for your HVAC system, regulating the temperature in your home. It does this by communicating with your furnace or air conditioning unit to maintain the desired temperature. Understanding its role can help demystify the wiring process. The thermostat reads the ambient temperature and activates the heating or cooling system to adjust to your settings. Its accuracy in temperature regulation ensures optimal comfort and energy efficiency in your home.
Types of Thermostats
There are various types of thermostats available, including programmable, non-programmable, and smart thermostats. Each comes with its wiring nuances. Programmable thermostats allow you to set schedules for different times of the day, enhancing energy efficiency. Non-programmable thermostats are straightforward, with manual temperature control. Smart thermostats offer advanced features like remote control via apps and integration with other smart home devices, requiring slightly more complex wiring.
Common Thermostat Wiring Configurations
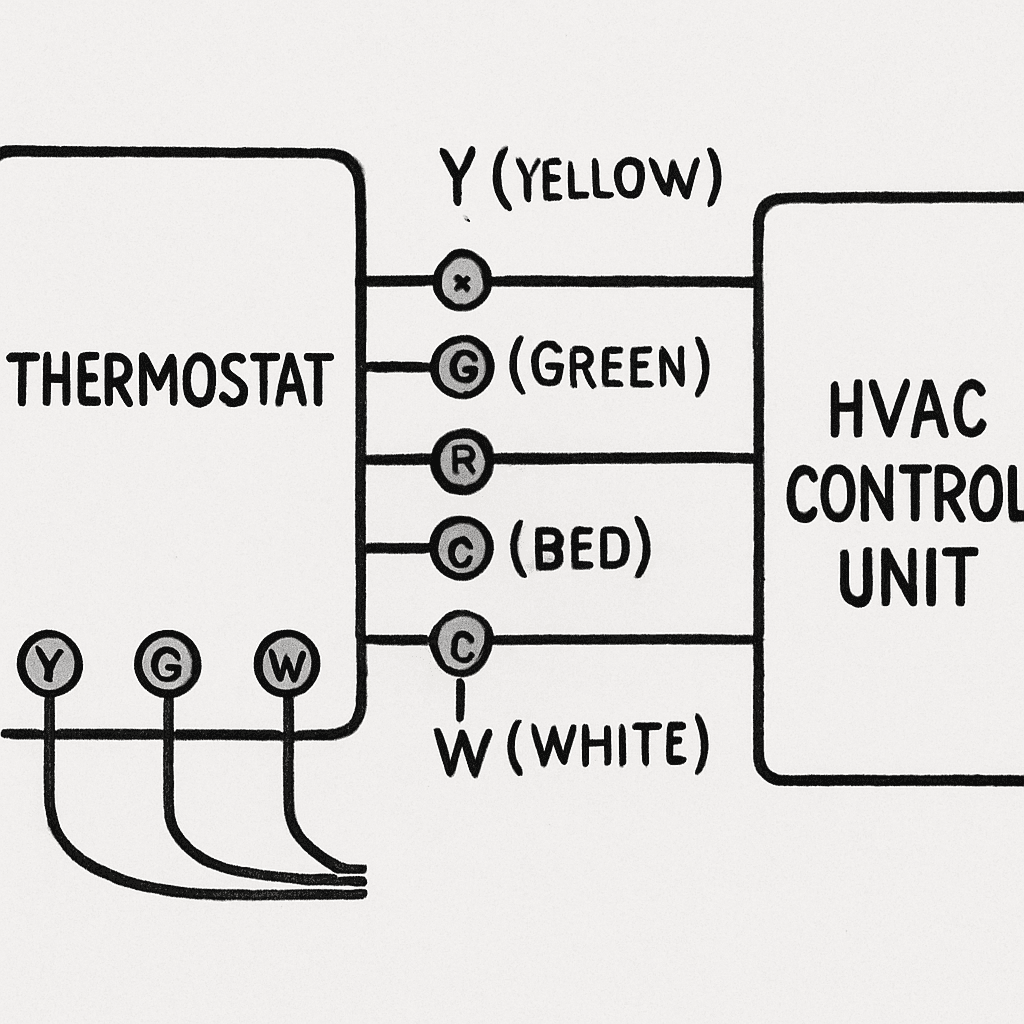
Understanding the common wiring configurations is crucial before you begin. Most thermostats follow a standard color-coding system for wires, although there can be variations. The typical configuration includes wires like R (Red) for power, W (White) for heat, Y (Yellow) for cooling, G (Green) for the fan, and C (Blue or Black) as a common wire for digital models. Familiarizing yourself with these will make the wiring process more intuitive. Each wire has a specific function, and connecting them correctly is vital for the thermostat’s operation.
Tools and Materials Required
Before you begin, ensure you have the following tools and materials:
Essential Tools for the Job
Having the right tools at your disposal makes the process smoother. A screwdriver is essential for removing and attaching the thermostat base to the wall. A wire stripper is crucial for preparing the wires before connection, ensuring they fit snugly into the terminals. Electrical tape can be used for securing the wires and adding an extra layer of insulation to prevent accidental shorts. These tools are readily available at hardware stores and are useful for various household projects.
Selecting the Right Thermostat
Choosing a thermostat compatible with your HVAC system is crucial. Check the specifications of your heating and cooling system to ensure compatibility. Most modern thermostats come with a wiring diagram that simplifies the installation process. This diagram acts as a map, guiding you on which wires go where. It’s also essential to consider the features you need, such as programmability and smart capabilities, to ensure the thermostat meets your lifestyle needs.
Preparing Your Workspace
Prepare your workspace by clearing the area around the thermostat. Remove any obstructions to ensure easy access to the wires. This preparation will make the process more efficient and reduce the risk of accidents. Having a clean and organized workspace allows you to focus on the task, minimizing errors. Gather all tools and materials before starting to avoid interruptions and ensure a smooth installation process.
Safety First: Turn Off Power
Safety is paramount when working with electrical systems. Before you start, turn off the power to your HVAC system at the circuit breaker to prevent any electrical shock or damage.
Importance of Safety Precautions
Safety cannot be overstated when dealing with electrical components. Turning off the power at the circuit breaker is the first step in ensuring a safe working environment. This precaution protects you from potential electrical shocks that can occur if wires are accidentally touched. It’s also crucial to inform others in the household to avoid turning the power back on while you’re working.
Verifying Power Disconnection
After switching off the power, verify that the power is indeed off. You can do this by attempting to turn on the heating or cooling system from the thermostat. If the system doesn’t respond, the power is successfully disconnected. Double-checking this step ensures that the workspace is safe and reduces the risk of accidents during installation. It’s a small but vital step that adds an extra layer of safety.
Using Personal Protective Equipment
Consider using personal protective equipment (PPE) such as gloves and safety goggles when handling electrical wires. Gloves can protect against accidental cuts and provide insulation from electrical currents. Safety goggles protect your eyes from dust and debris that may dislodge during the installation process. While these items are not mandatory, they add an extra layer of safety and are recommended for those unfamiliar with electrical work.
Step-by-Step Guide to Wiring a Thermostat
Step 1: Remove the Old Thermostat
- Remove the Cover: Gently pull the cover of the old thermostat to reveal the wiring. Ensure you handle it with care to avoid damaging the underlying wires.
- Label the Wires: Use masking tape to label each wire according to the terminal it connects to. This will make it easier to connect the new thermostat. Proper labeling is crucial for maintaining the wiring order, preventing confusion during the installation of the new unit.
- Disconnect the Wires: Unscrew the wires from the terminals and remove the old thermostat. Carefully note any additional wires that may not be in use, as they might be relevant for the new thermostat.
Step 2: Install the New Thermostat Base
- Mount the Base: Align the new thermostat base with the wall and mark the screw holes. Ensure that it’s level to maintain an aesthetically pleasing installation.
- Drill Holes: If necessary, drill holes and insert wall anchors for a secure fit. Wall anchors provide added stability and prevent the thermostat from loosening over time.
- Attach the Base: Screw the base into the wall, ensuring it’s level. A level installation ensures that the thermostat functions correctly and looks professional.
Step 3: Connect the Wires to the New Thermostat
- Use the Wiring Diagram: Refer to the thermostat wiring diagram to connect each wire to the corresponding terminal. Common terminals include: R (Red): Power, W (White): Heat, Y (Yellow): Cooling, G (Green): Fan, C (Blue or Black): Common wire (for digital thermostats). Double-check each connection to avoid errors.
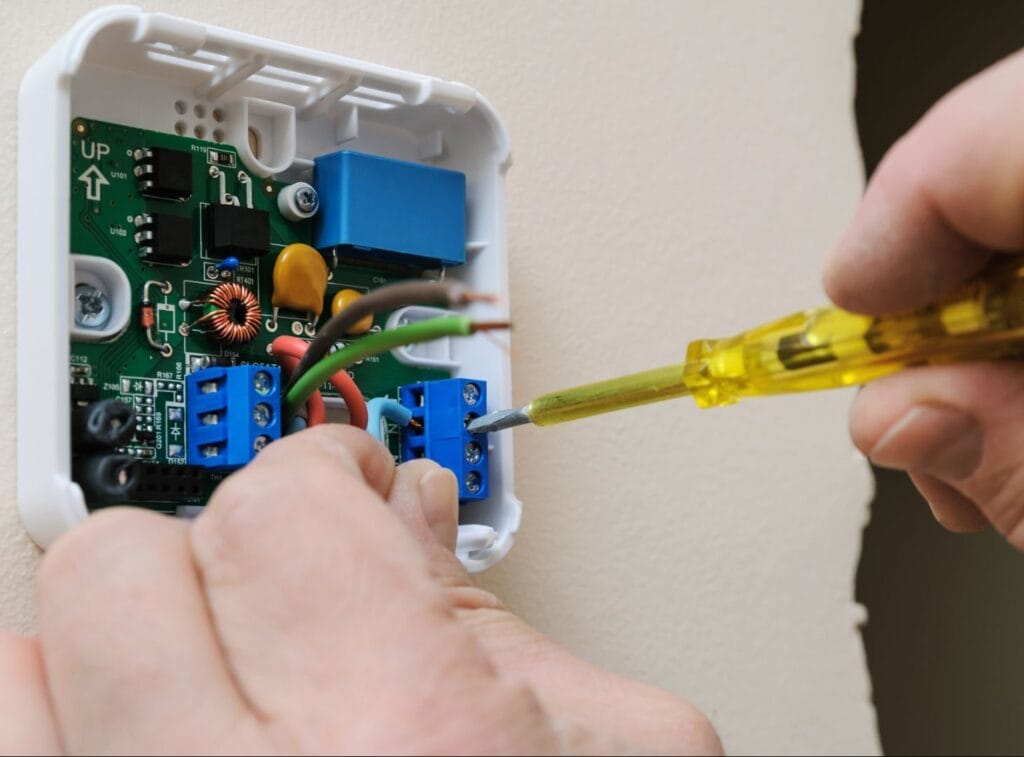
- Secure the Connections: Use a screwdriver to tighten the screws and ensure a secure connection. Loose connections can cause the thermostat to malfunction or not function at all.
- Double-Check Your Work: Ensure all wires are connected to the correct terminals as per the wiring diagram. This step is crucial in preventing future operational issues.
Step 4: Attach the Thermostat Cover
Once all the wires are connected, snap the thermostat cover onto the base. Ensure it fits snugly and securely. A properly attached cover protects the wires and gives the thermostat a finished look.

Testing the Thermostat
- Turn On the Power: Switch the power back on at the circuit breaker. Ensure the power is restored before proceeding with the testing phase.
- Test the System: Set the thermostat to a temperature above the current room temperature to test the heating system. Do the same for cooling by setting it below the room temperature. Observe if the HVAC system responds appropriately.
- Troubleshooting: If your system doesn’t respond, recheck the wiring connections. Ensure all wires are connected securely and to the correct terminals. Consider consulting the thermostat’s manual for troubleshooting tips if issues persist.
Wiring Wireless and Smart Thermostats
For wireless or smart thermostats, the process is similar, but these devices often require a common wire (C wire) for power. If your current setup lacks a C wire, you may need an adapter or professional installation.
Understanding Smart Thermostat Features
Smart thermostats come with a host of features that can enhance your home’s comfort and efficiency. They offer the ability to control your thermostat remotely via smartphone apps, allowing you to adjust the temperature from anywhere. This feature is particularly useful for those with irregular schedules, ensuring your home is always at the right temperature when you arrive. Additionally, smart thermostats can learn your habits over time and adjust settings automatically for optimal comfort and energy savings.
Installing a C Wire Adapter
In some cases, your current HVAC system may not have a C wire. This wire is necessary for powering smart thermostats. Installing a C wire adapter can solve this issue, providing the necessary power. The adapter connects to your HVAC system and provides the additional wire needed for smart thermostat operation. While installation can be straightforward, consulting a professional can ensure it’s done correctly.
Integrating with Smart Home Systems
Smart thermostats can integrate seamlessly with other smart home systems, offering enhanced control and convenience. You can connect your thermostat to systems like Amazon Alexa or Google Home, allowing voice control over your home’s temperature. This integration can be particularly beneficial for those seeking a fully automated smart home experience. The ability to control your home’s climate through voice commands or automation routines adds a layer of convenience and modernity.
Benefits of Smart Thermostats
Smart thermostats offer numerous benefits, including:
- Remote Control via Smartphone Apps: Control your home’s temperature from anywhere, providing flexibility and convenience. This feature ensures your home is always comfortable when you return.
- Energy Savings through Efficient Heating and Cooling: Smart thermostats can learn your schedule and adjust settings to save energy. By optimizing heating and cooling, they help reduce utility bills.
- Integration with Smart Home Systems: Seamlessly integrate with other smart devices for a cohesive smart home experience. This allows for greater control and automation of your home’s climate.

When to Call a Professional
While DIY thermostat wiring can be straightforward, it’s not for everyone. If you encounter issues or prefer a professional touch, don’t hesitate to contact us at LC Heating and Air Conditioning. We’re here to ensure your HVAC system operates smoothly, keeping your home comfortable year-round. Feel free to reach out at (818) 858-7080 for assistance.
Recognizing When to Seek Help
It’s important to recognize when a task exceeds your comfort level or expertise. If you encounter unfamiliar wiring configurations or lack the necessary tools, it might be time to call a professional. A professional can ensure the installation is done correctly and safely, providing peace of mind. Their experience can also help identify any potential issues with your HVAC system that may not be immediately apparent.
Benefits of Professional Installation
Hiring a professional can save you time and potential frustration. They have the expertise to handle unexpected complications and ensure the job is done correctly the first time. Professionals also have access to specialized tools and equipment that can facilitate a smoother installation process. Their work often comes with a warranty, providing additional assurance that your system will operate as intended.
Ensuring Long-Term Efficiency
A professional installation ensures that your thermostat and HVAC system operate at peak efficiency. Proper installation reduces the risk of future issues, saving you time and money on repairs. Professionals can also provide maintenance tips to keep your system running smoothly for years. Regular maintenance checks can prevent small issues from becoming major problems, ensuring your home remains comfortable and efficient.
Conclusion
Wiring a thermostat is a valuable skill that can save you time and money. By following this step-by-step guide, you can confidently tackle the task while ensuring safety and efficiency. Remember, if you ever feel uncertain, professional help is just a call away. At LC Heating and Air Conditioning, we’re dedicated to providing quality service and customer satisfaction.
Continuing Your HVAC Education
Thermostat wiring is just one aspect of maintaining a comfortable home environment. Continuing to educate yourself on HVAC systems can lead to better decision-making and enhanced home efficiency. Consider learning about routine maintenance tasks and energy-saving tips to maximize your system’s performance. Staying informed empowers you to take control of your home’s comfort.
Joining the Community
For more tips and expert advice, stay connected with us and join our community of satisfied homeowners. Together, we’ll keep your home comfortable and efficient. Our community offers a wealth of knowledge and support, providing insights into common HVAC issues and solutions. Engaging with others can also offer new perspectives and ideas for improving your home’s climate control.
Embracing Future Innovations
The HVAC industry is constantly evolving, with new technologies and innovations emerging regularly. Embracing these advancements can lead to improved home comfort and efficiency. Keep an eye out for new products and features that align with your lifestyle and needs. By staying informed and adaptable, you can ensure your home remains at the forefront of comfort and convenience.
Happy wiring!


